SyncNotes Setup Guide
A practical, step-by-step guide to connect Obsidian LiveSync to your SyncNotes vault.
Recommended: use the Quick Setup URI from your Dashboard for the fastest setup.
Step 1: Install the plugin
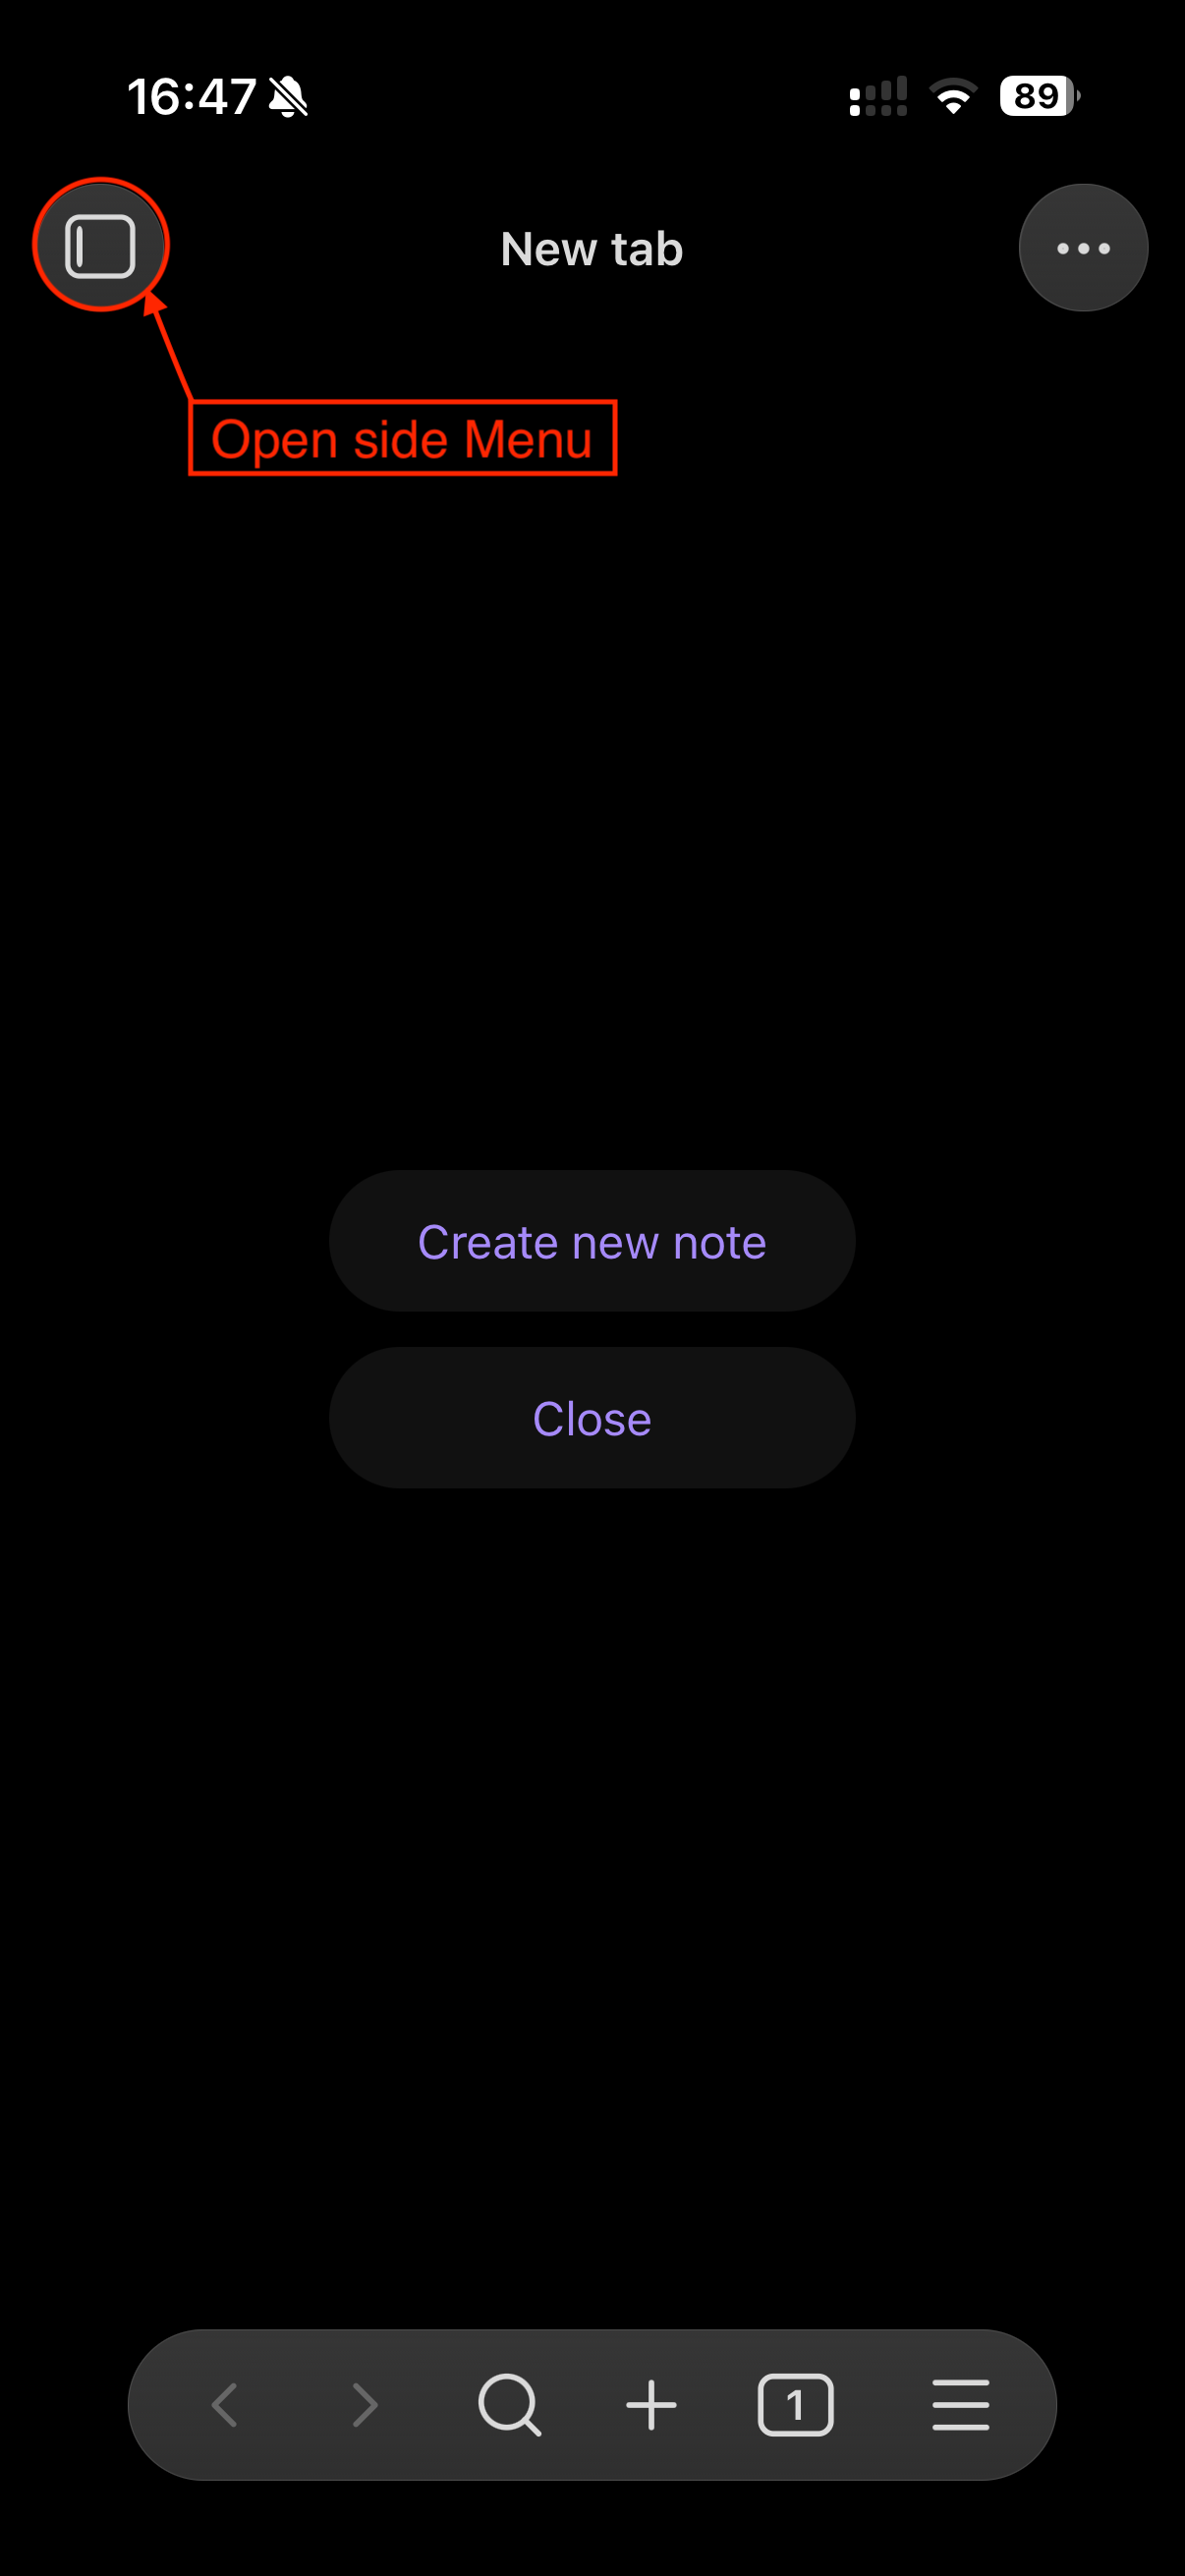
- Open Obsidian.
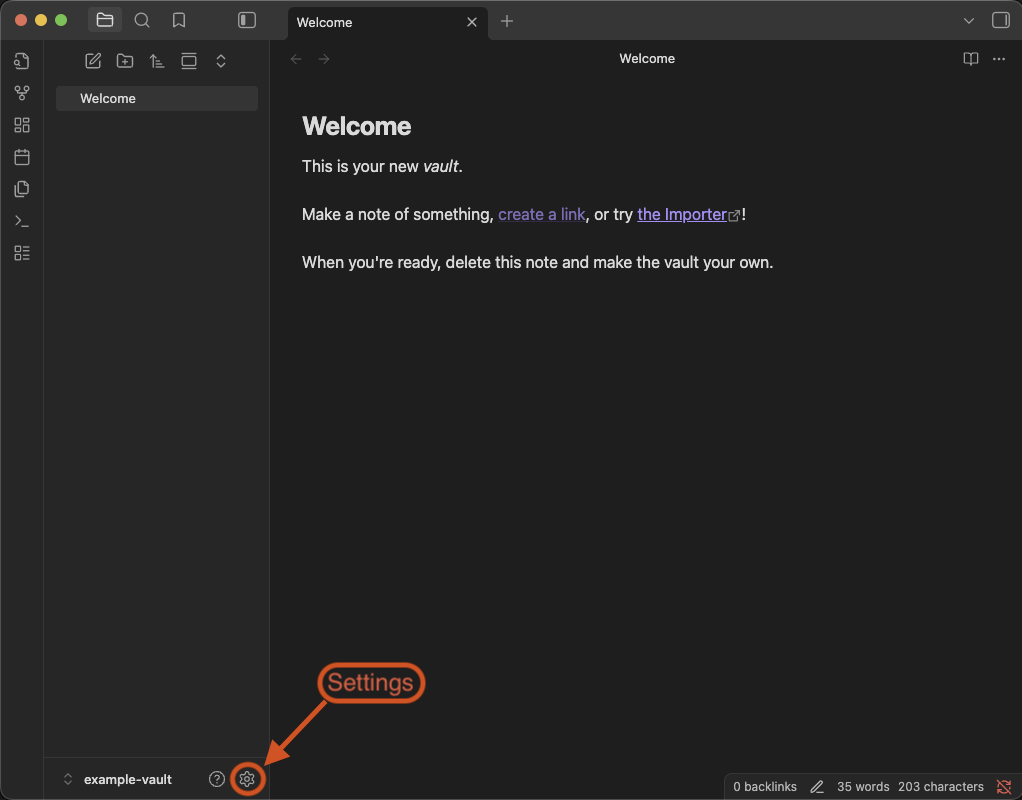
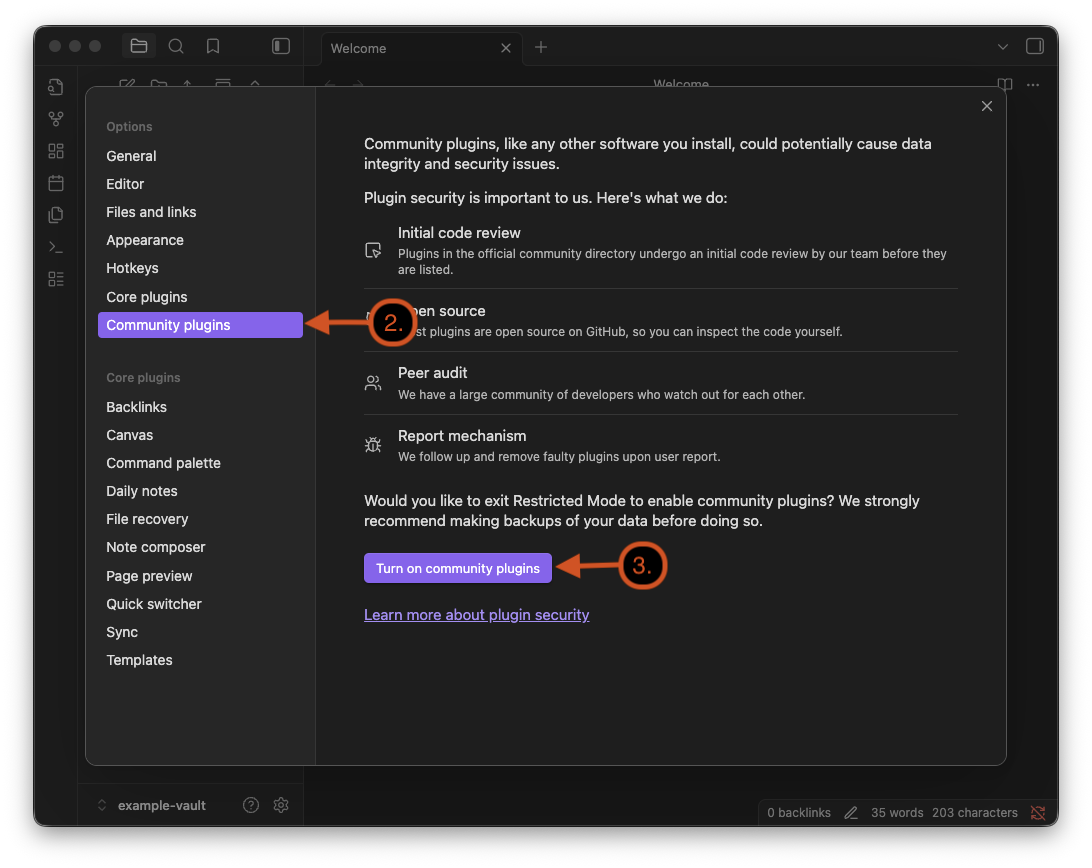
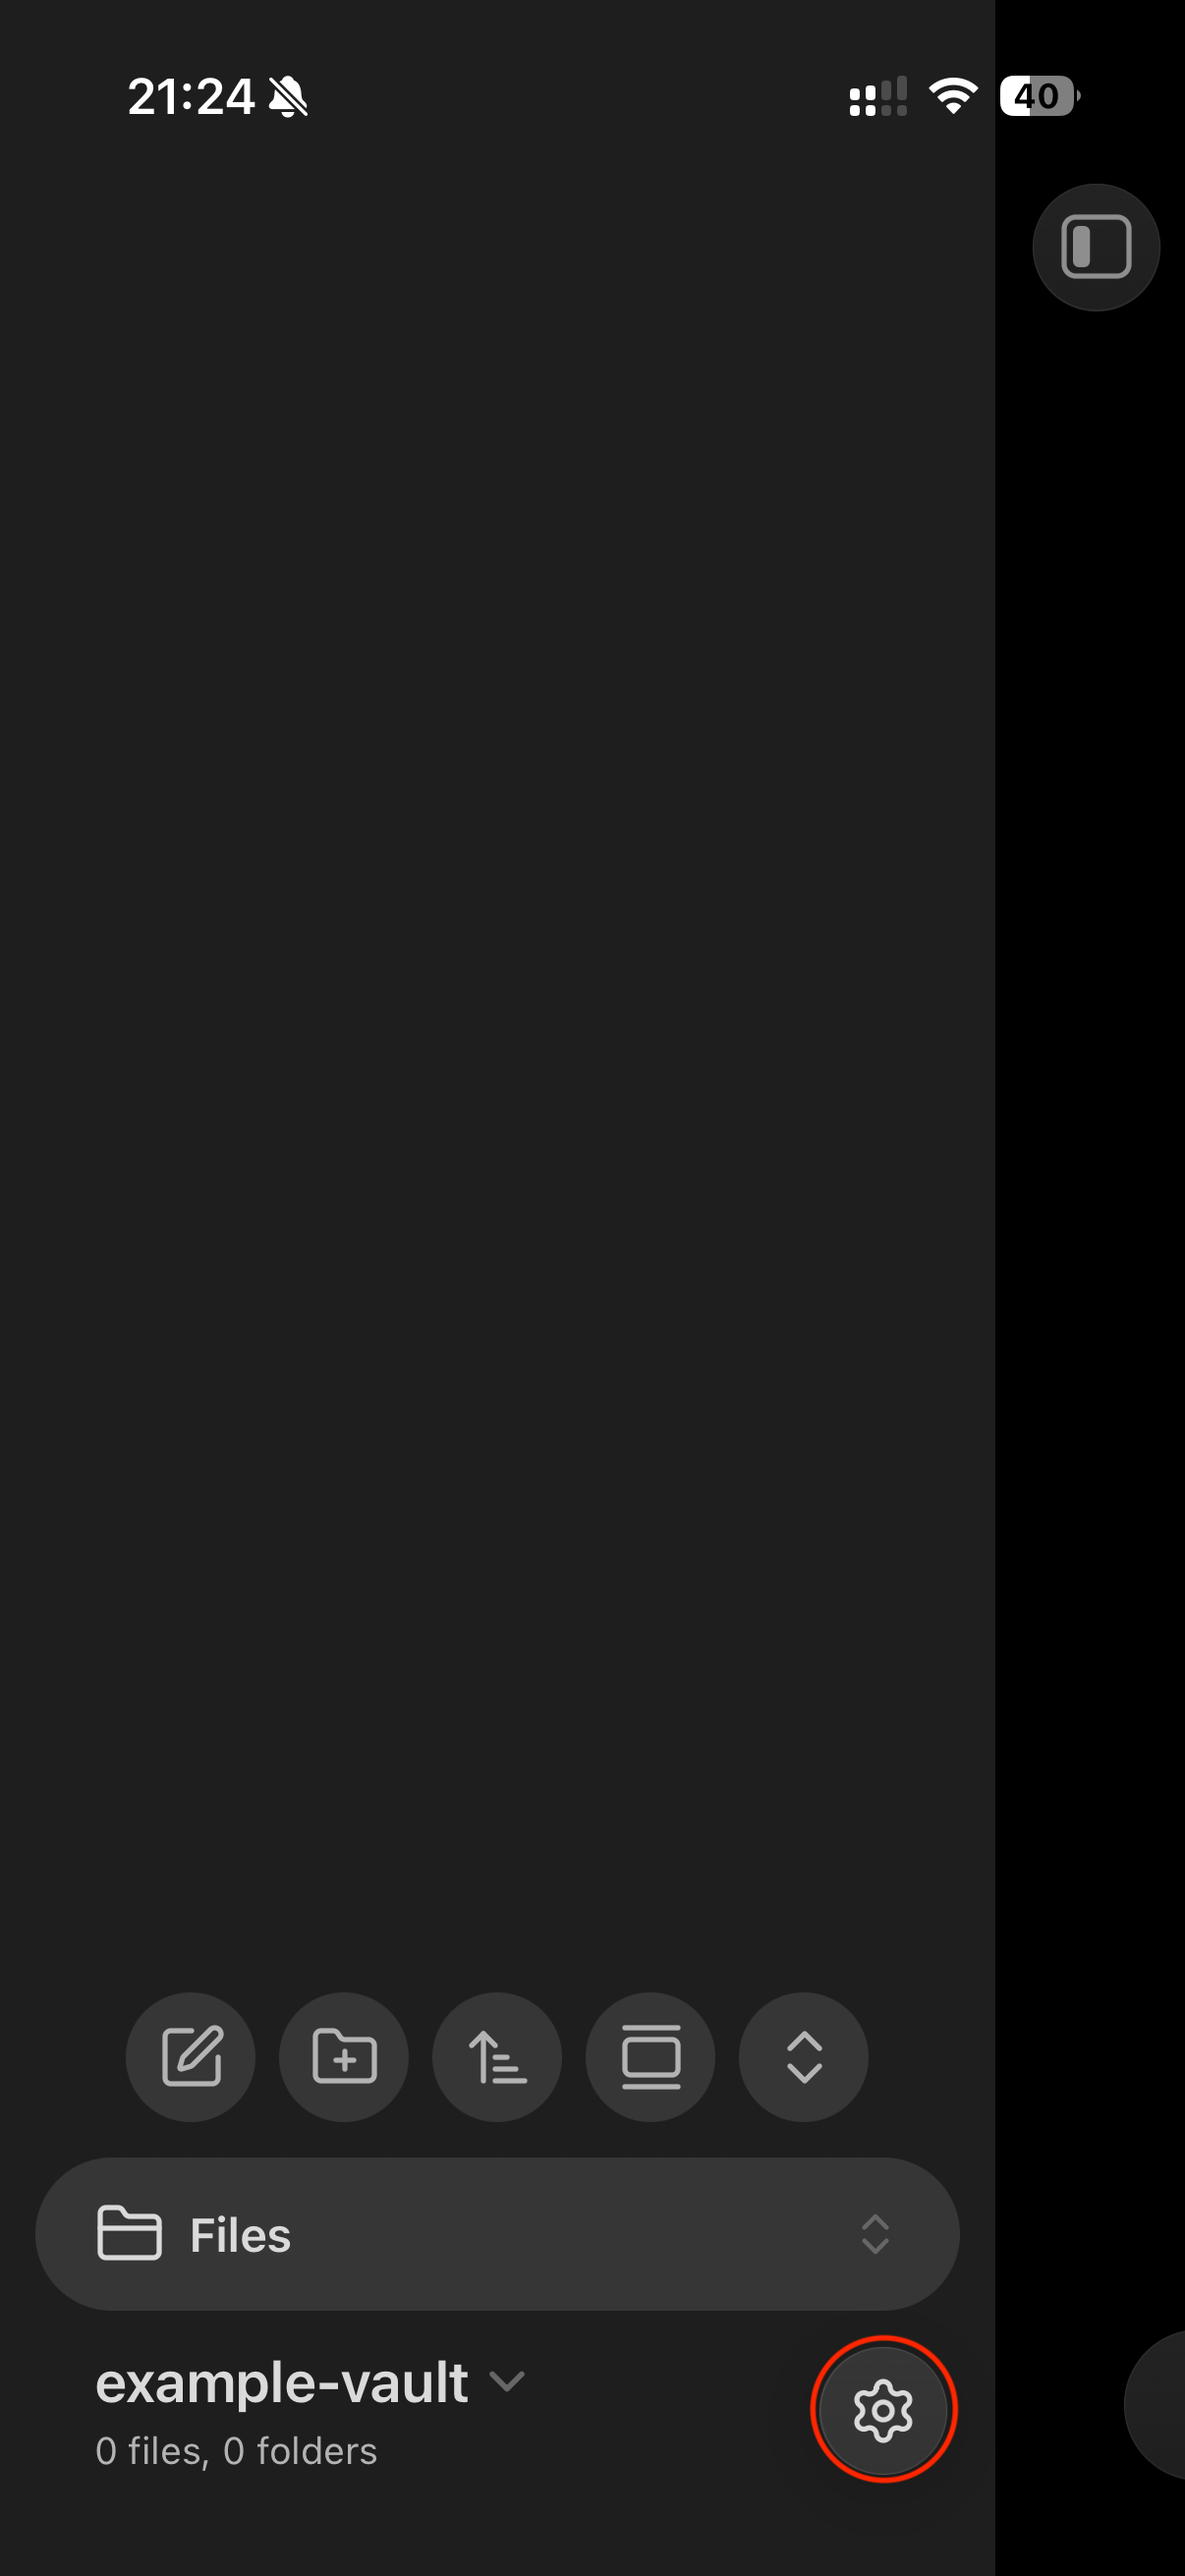
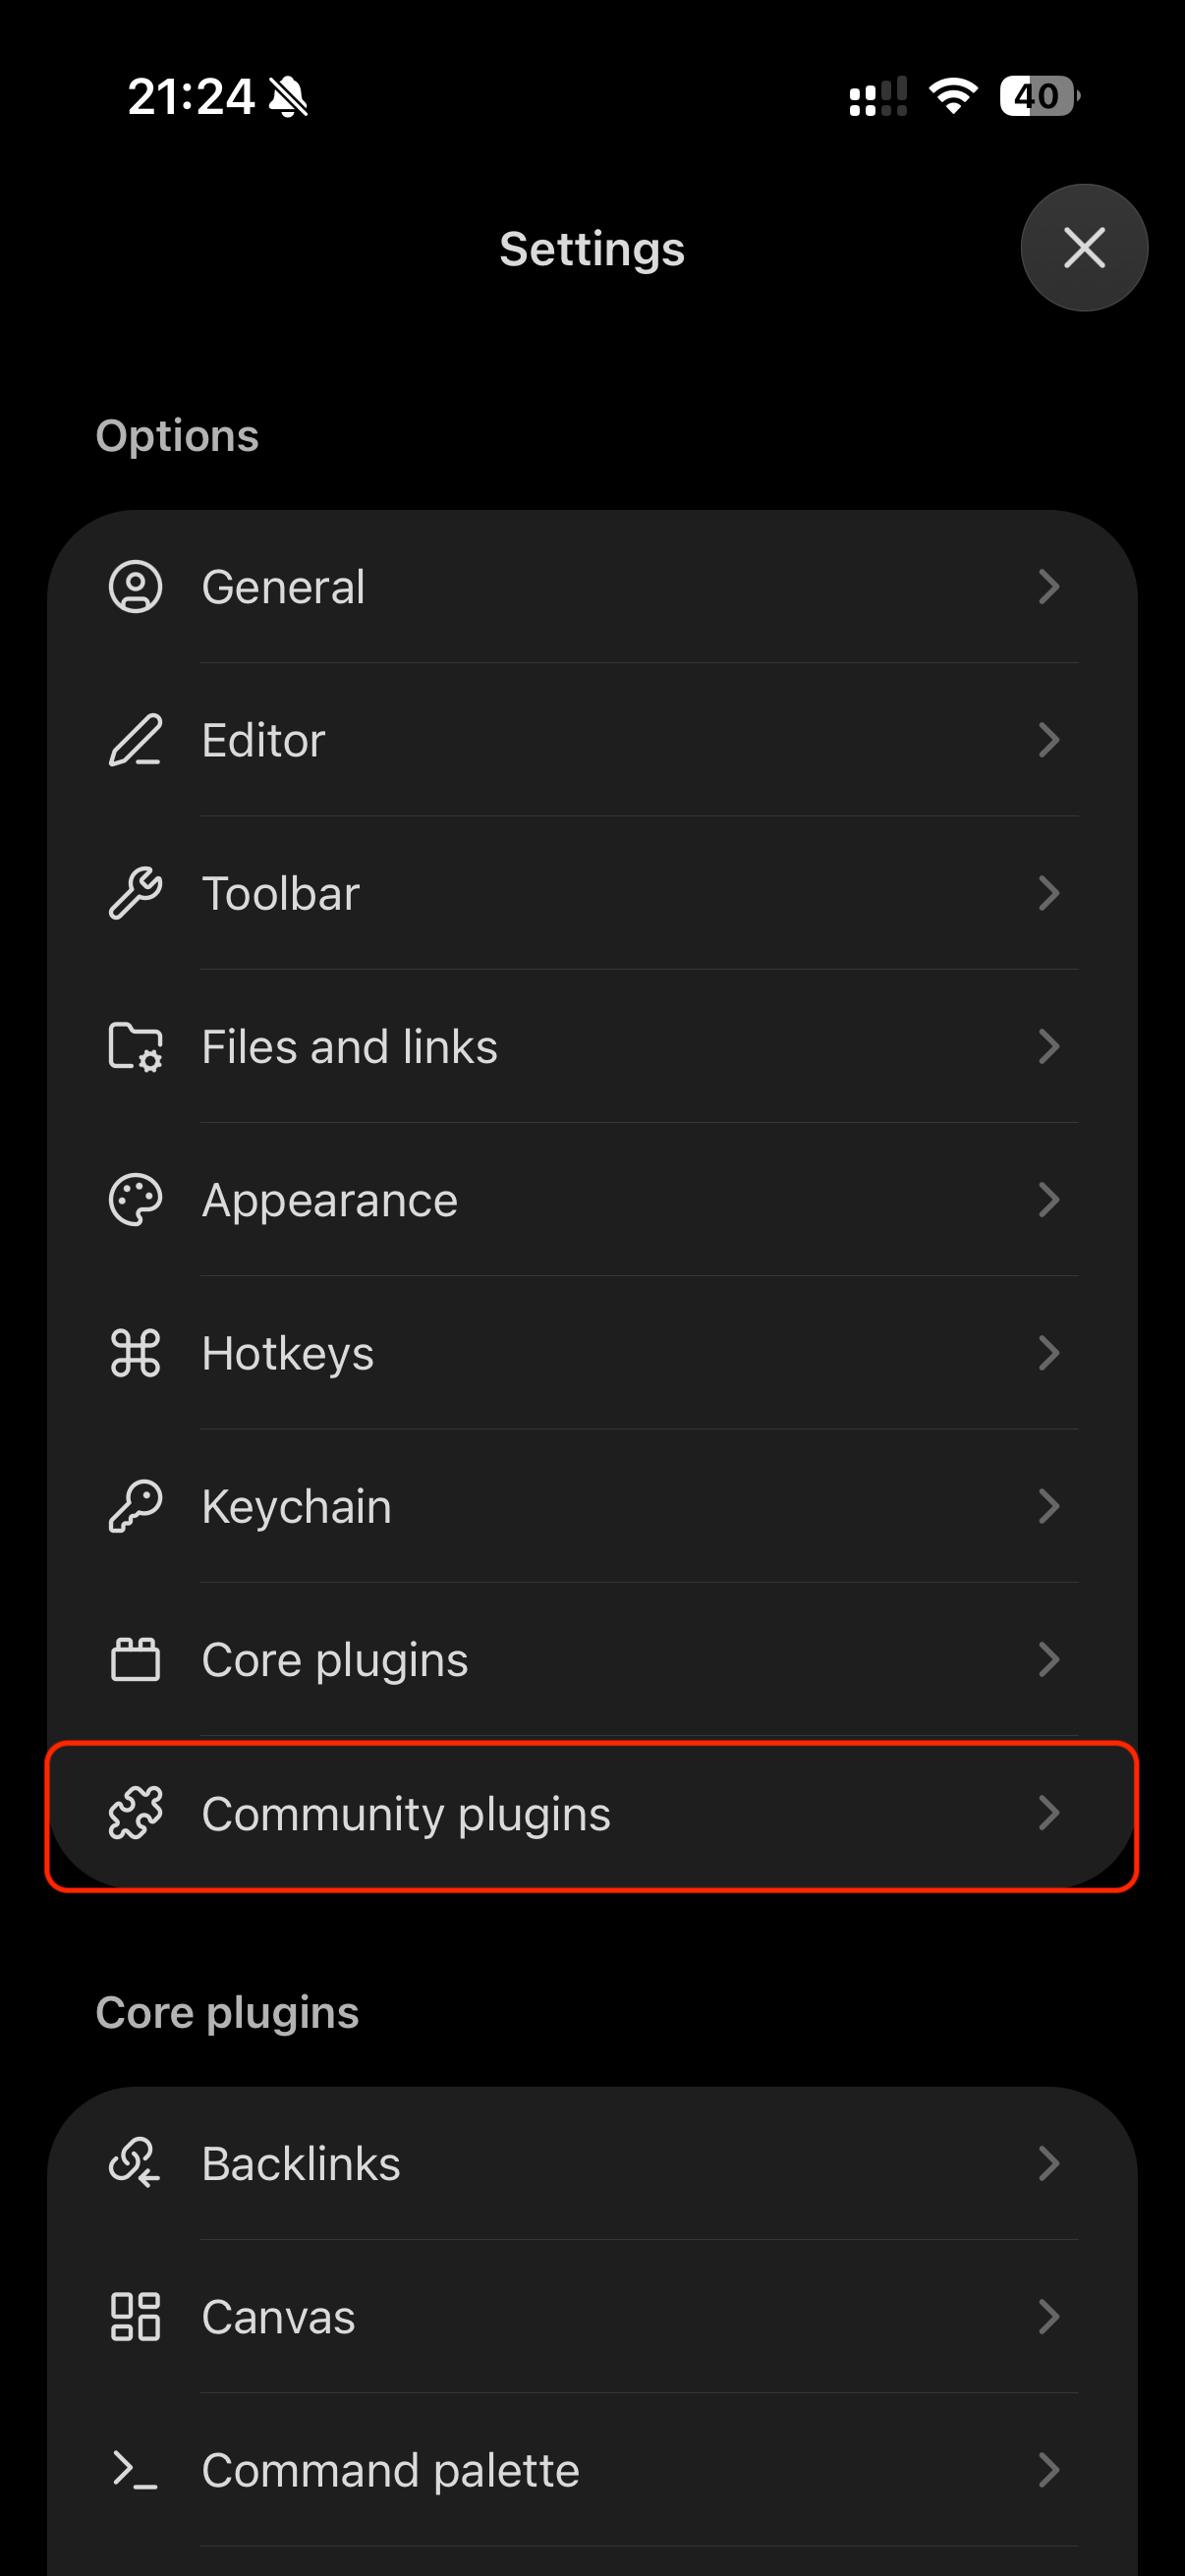
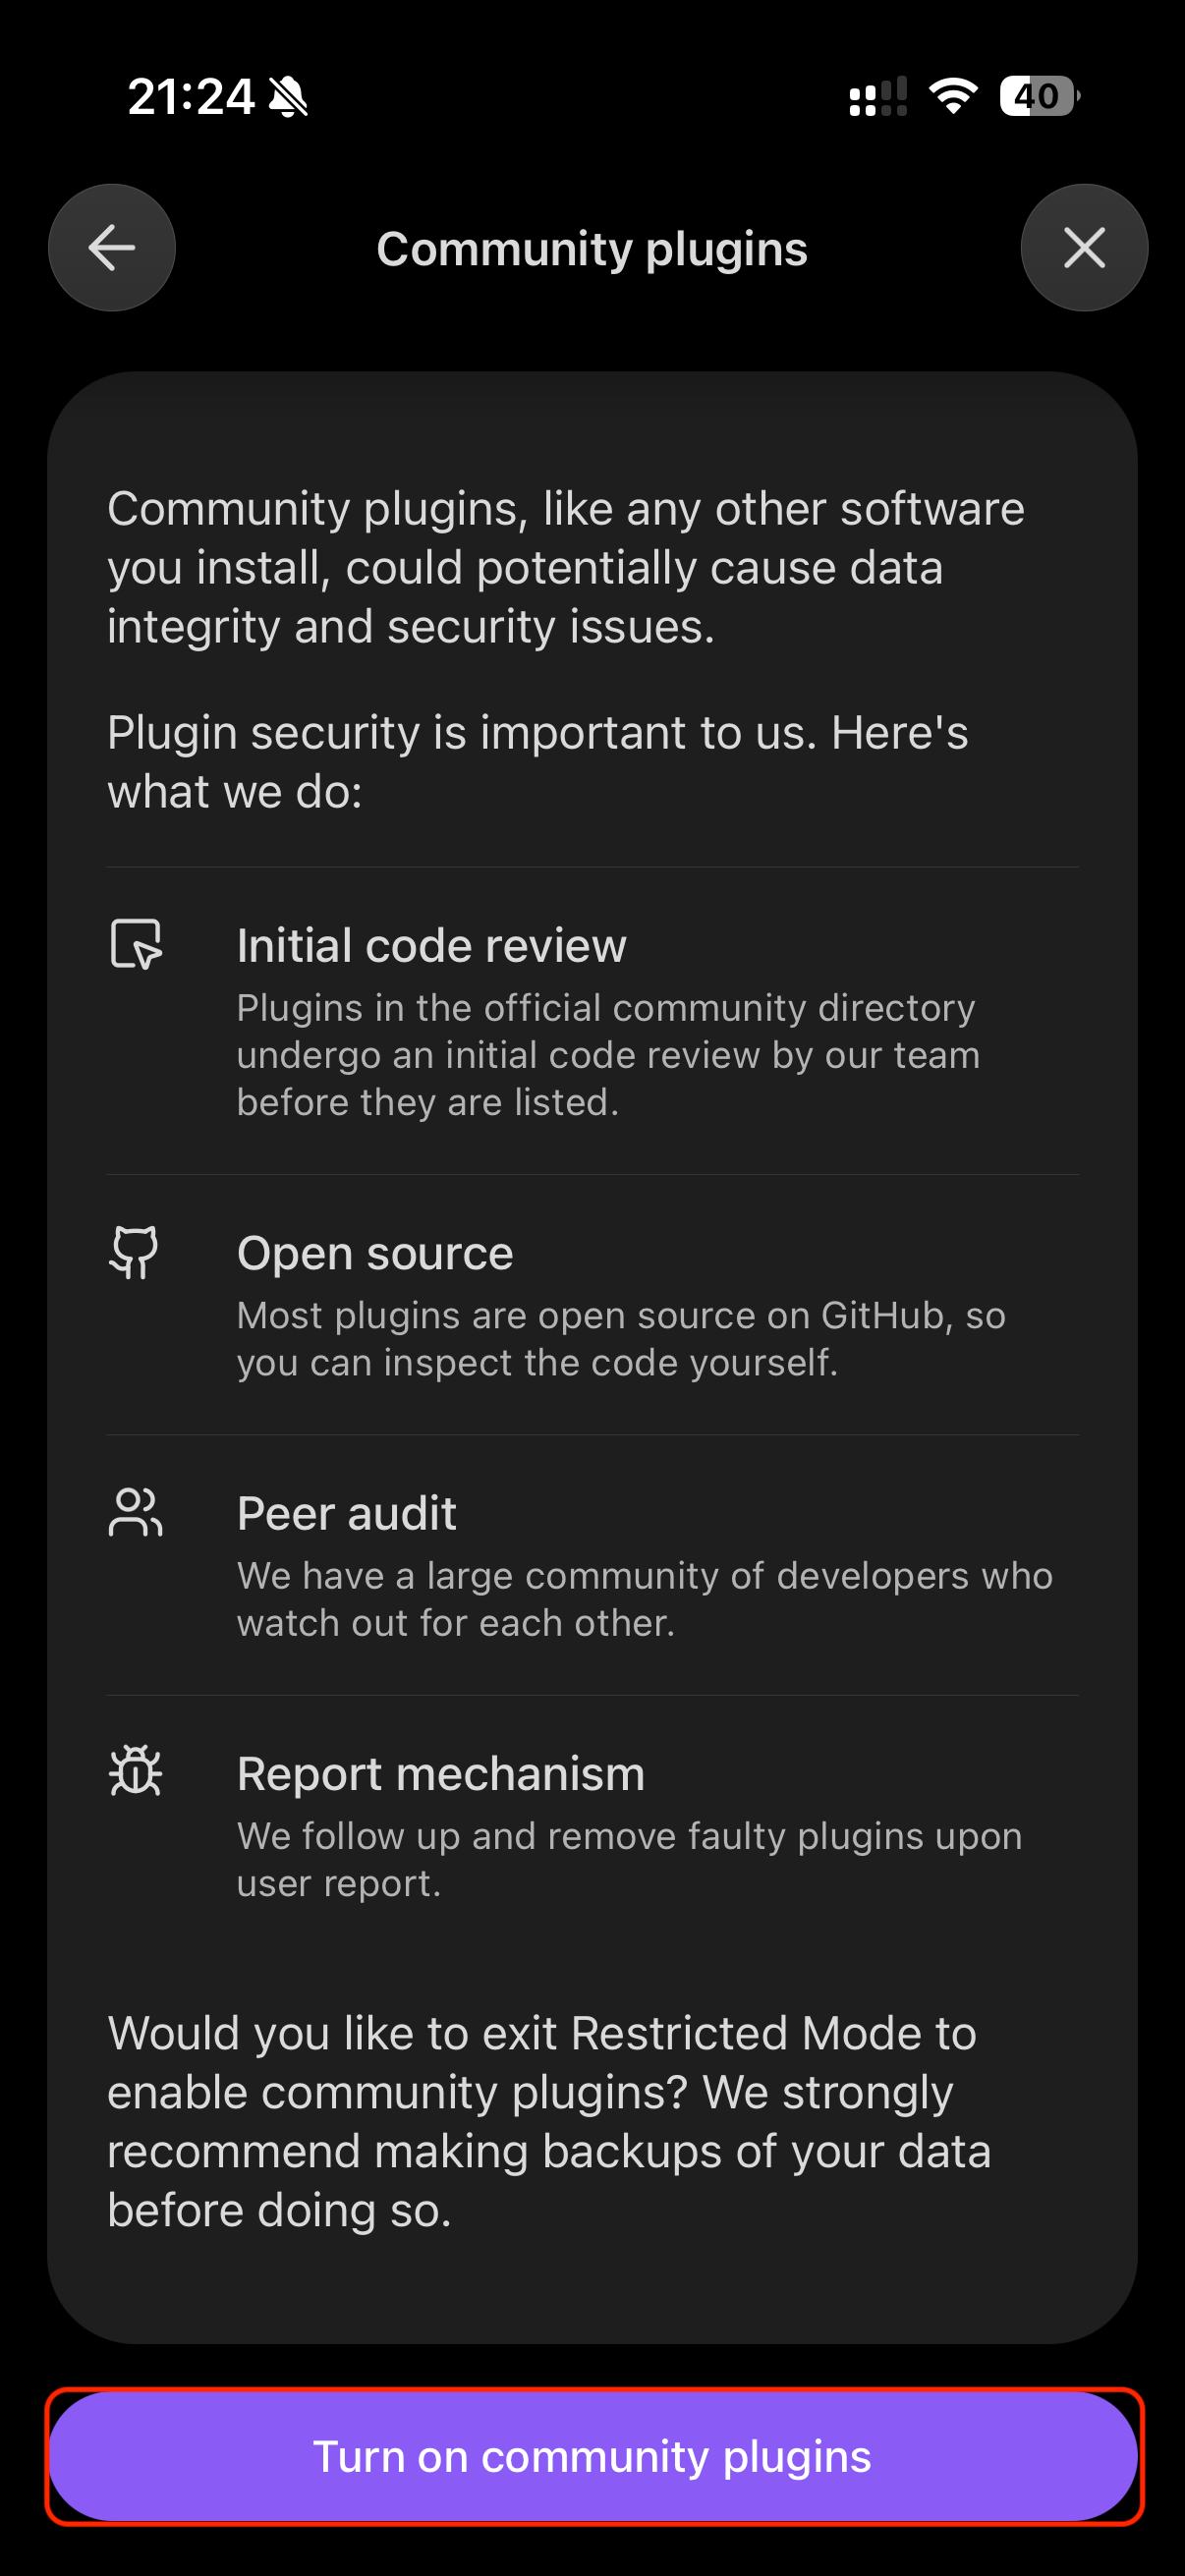
- Go to Settings → Community plugins.
- Turn on community plugins.
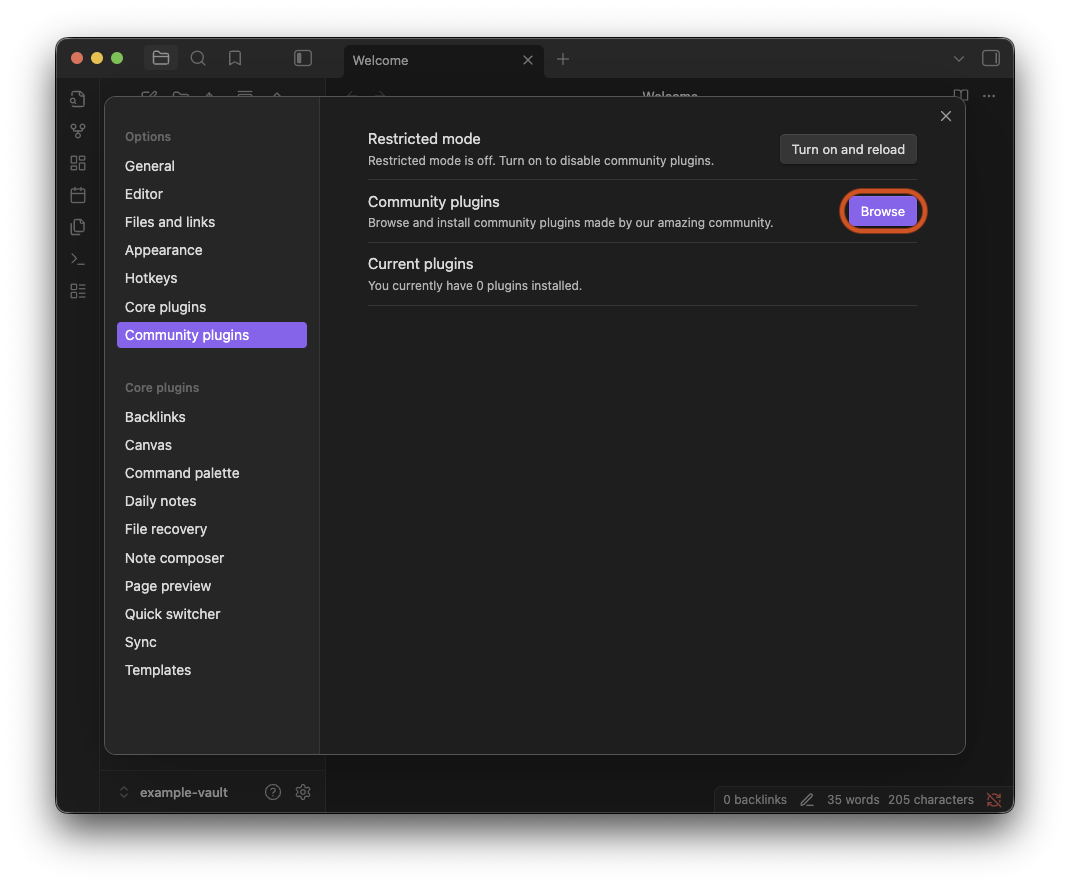
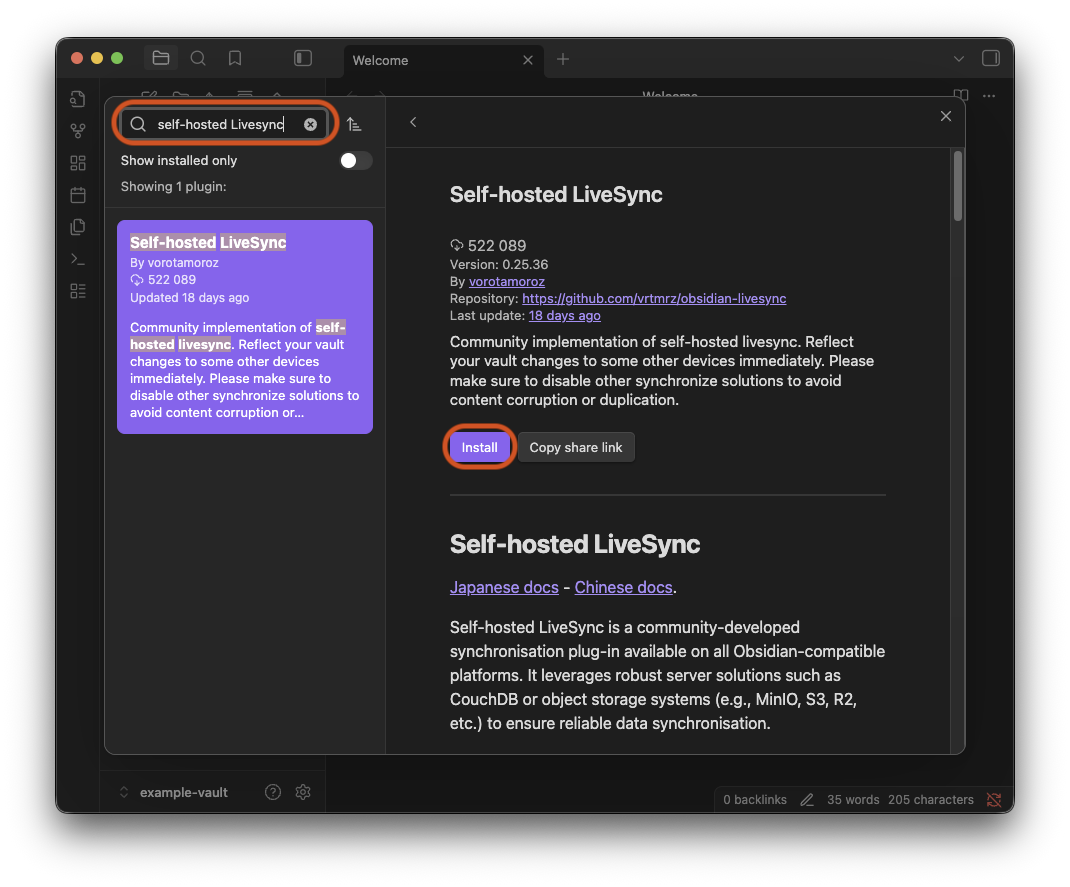
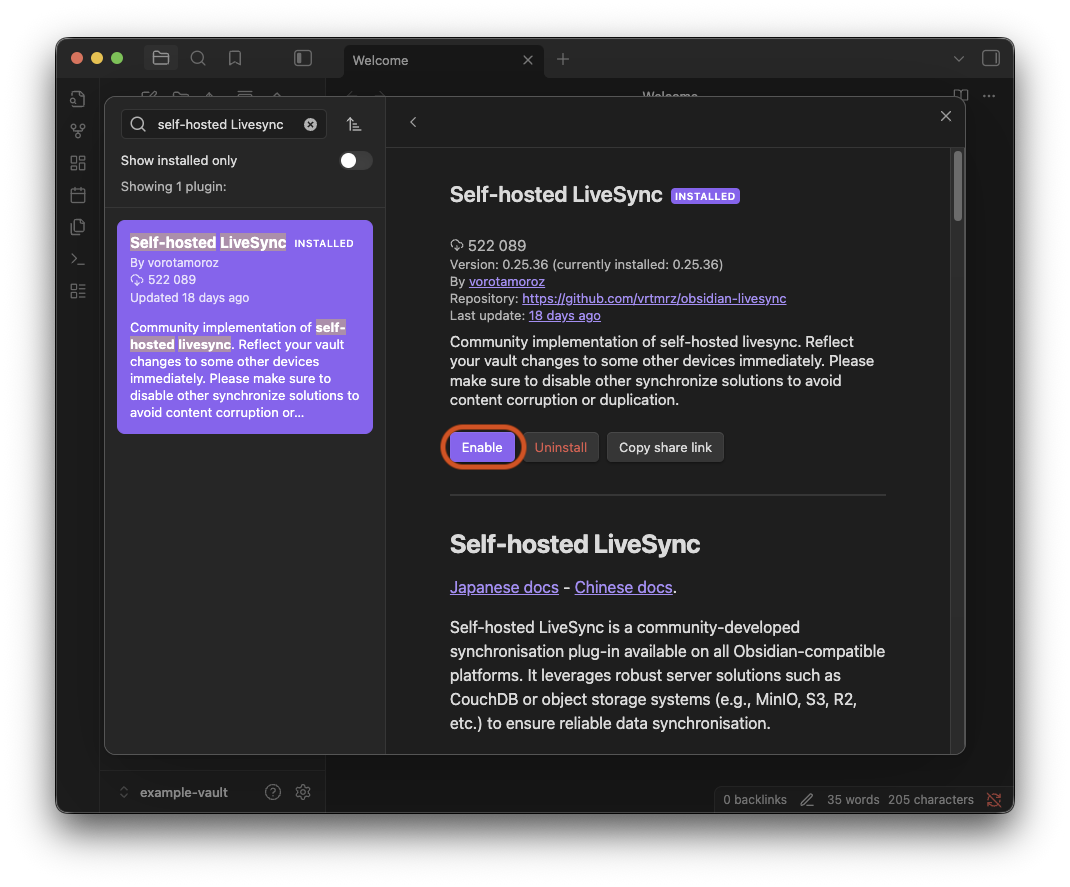
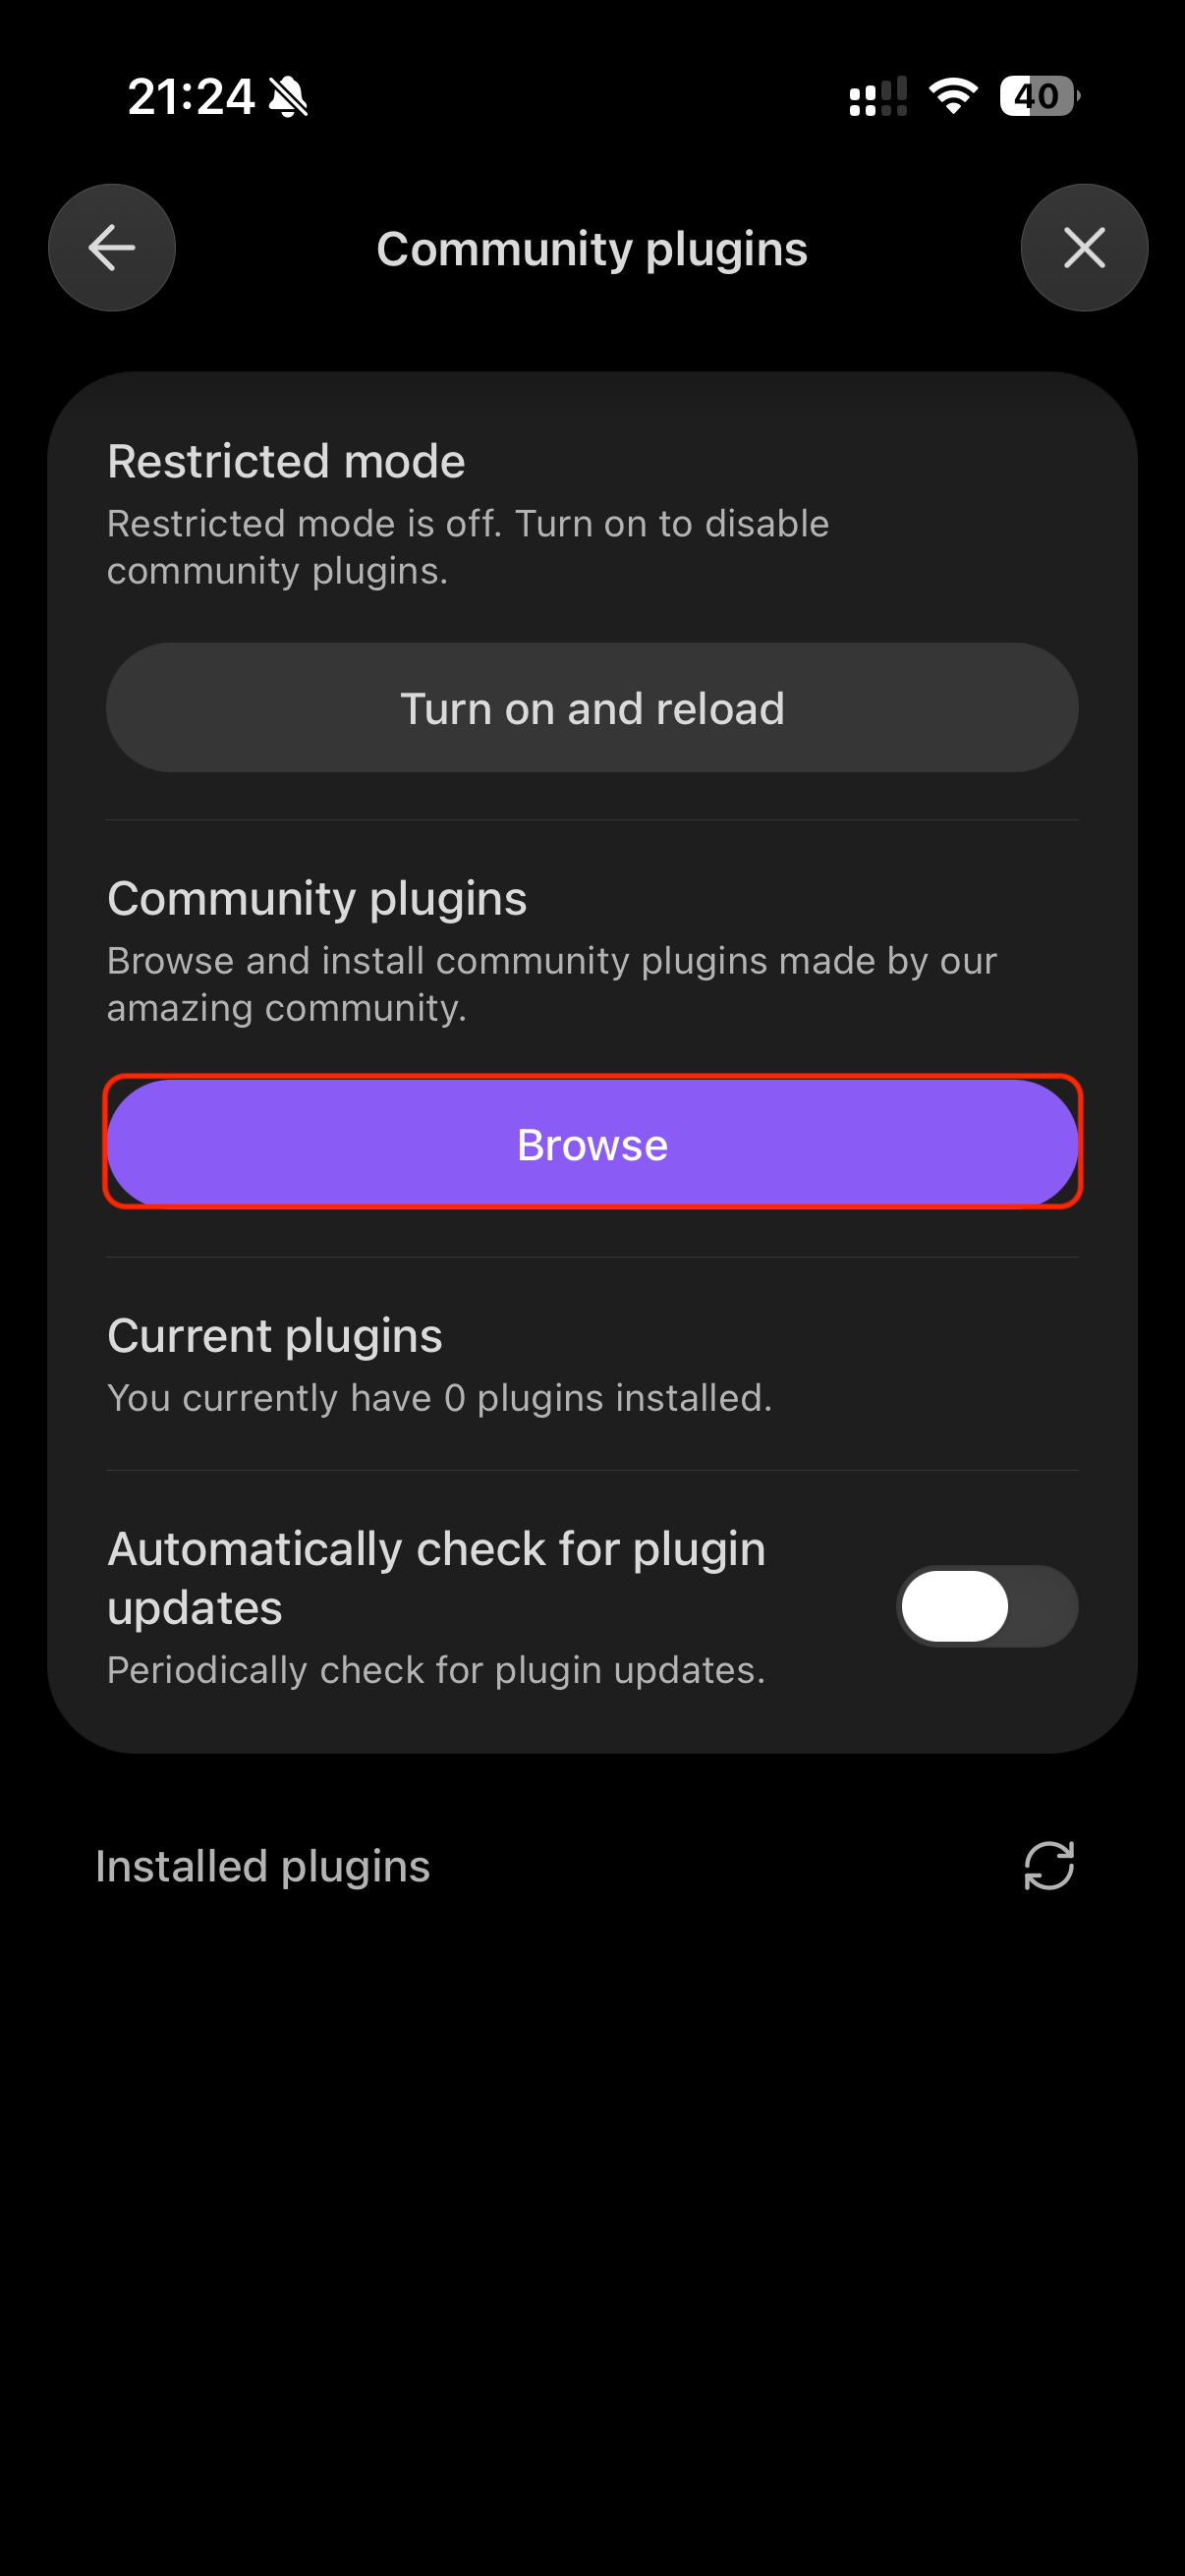
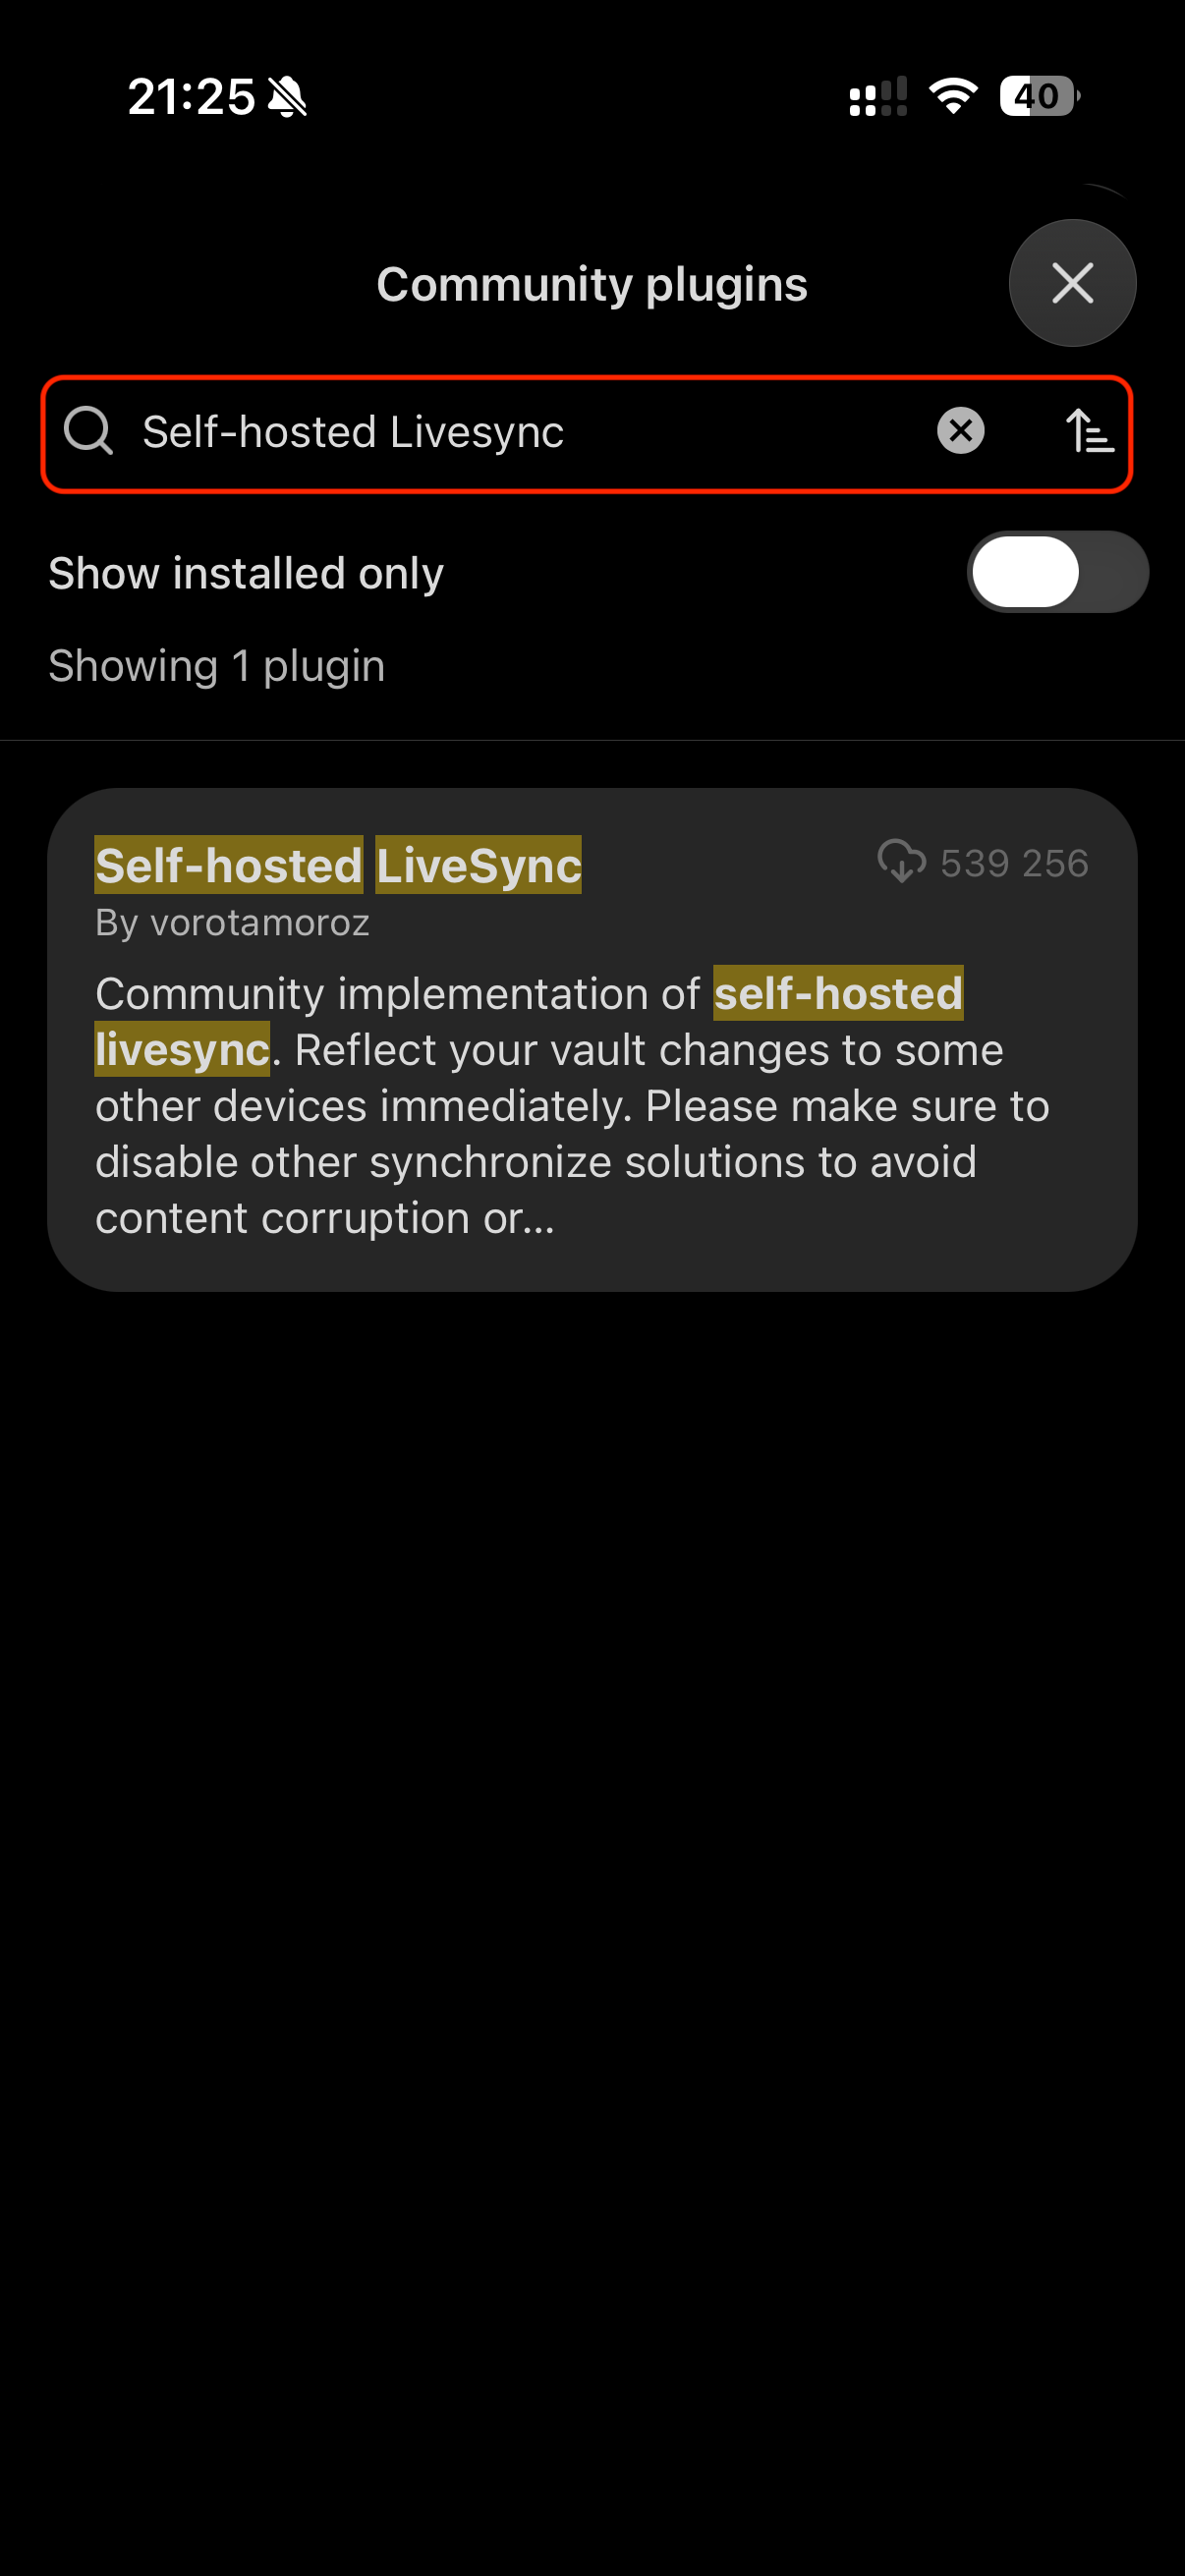
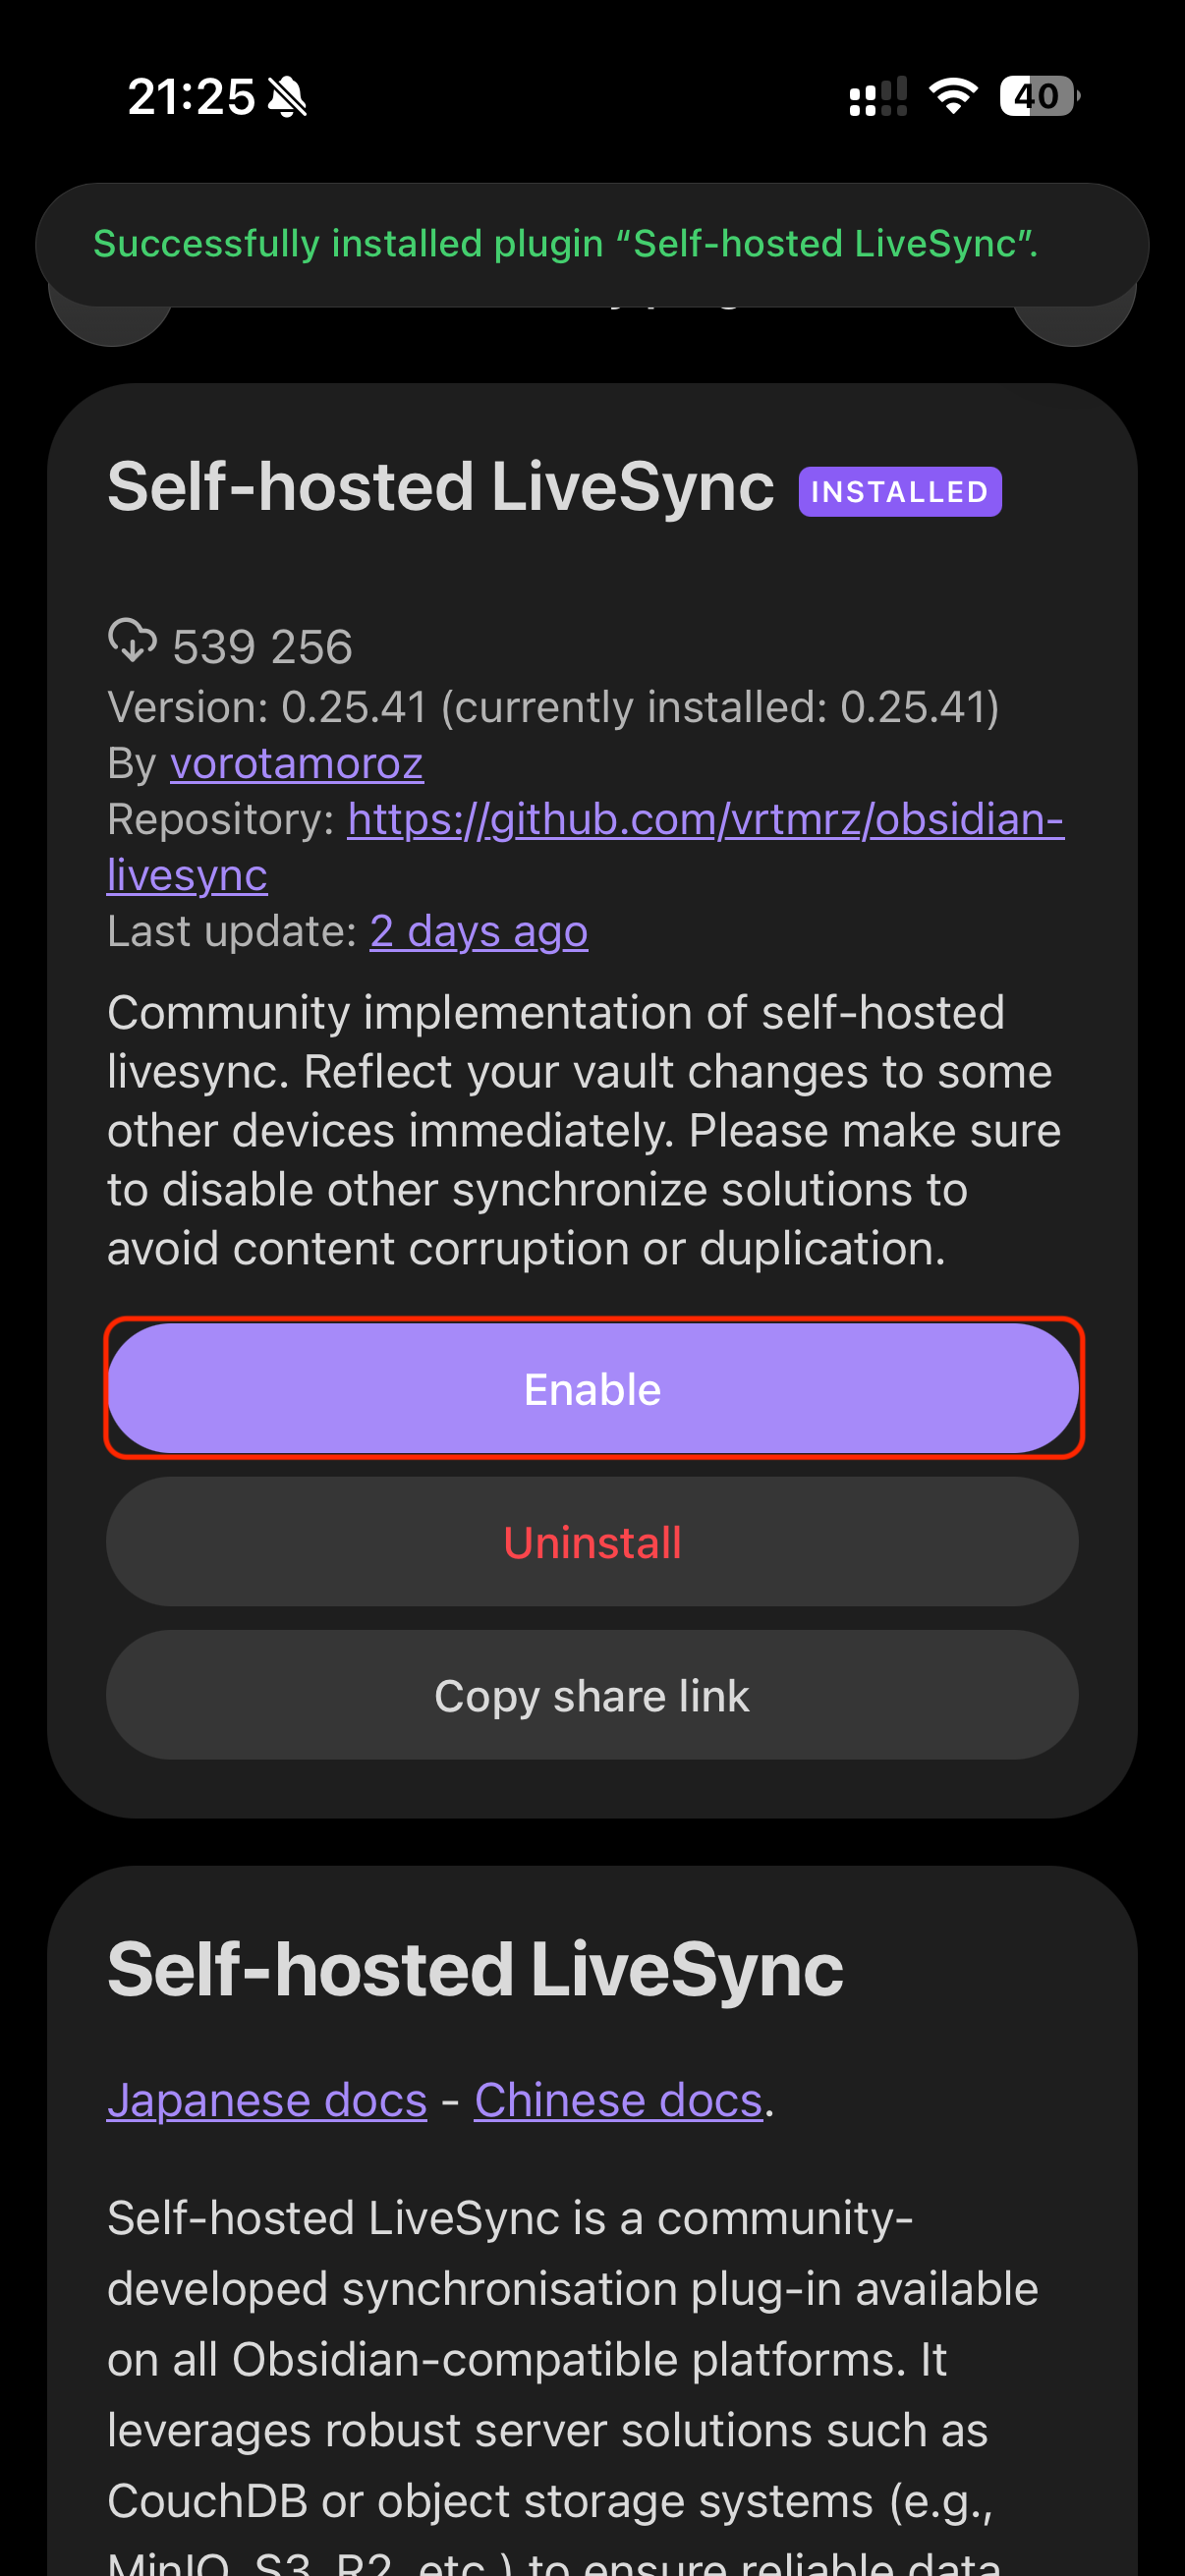
- Click Browse and search for Self-hosted LiveSync.
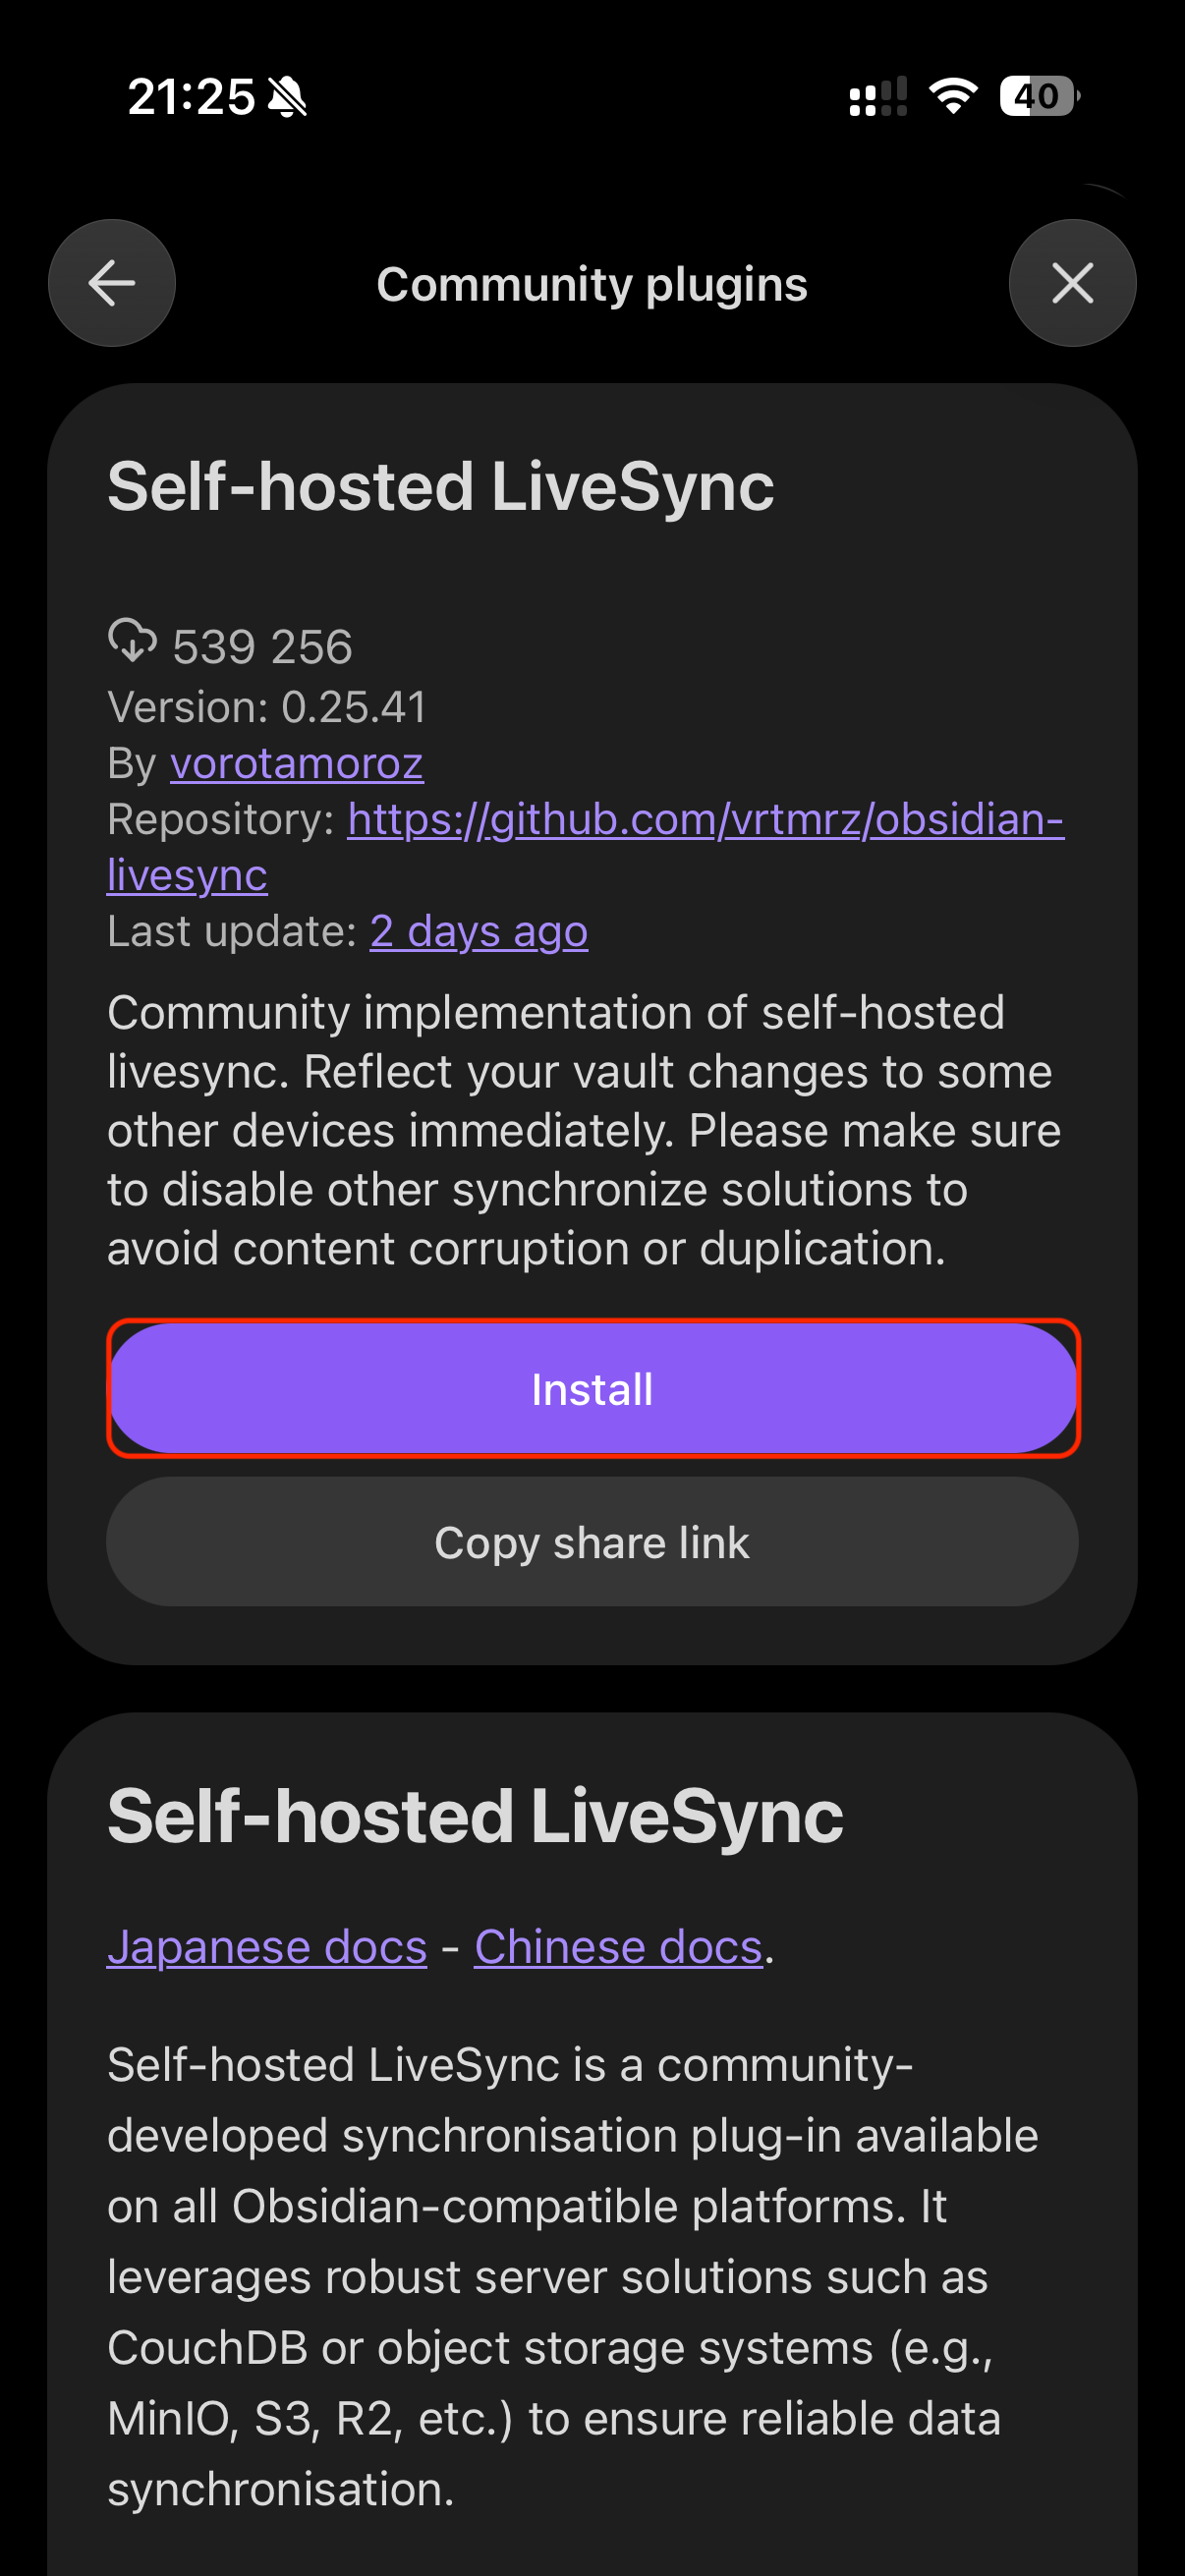
- Install, then Enable the plugin.
Plugin project: vrtmrz/obsidian-livesync
Step 2 (Recommended): Quick setup with a Setup URI
Use this flow if you want the fastest and most consistent setup across devices.
1) Generate the Setup URI in SyncNotes
- Open your SyncNotes Dashboard.
- Find Quick Setup (Recommended).
- Enter a Setup URI passphrase to protect the setup link (required).
- E2EE Passphrase (optional): enter your own or click Generate to create one in your browser. Save it in your password manager before continuing. Leave this field blank to disable E2EE; uploaded notes may then be readable by the service operator.
- Click Generate URI. Check the encryption status shown with the link.
2) Import the Setup URI in Obsidian
- Open Self-hosted LiveSync settings in Obsidian.
- Use the option to Import / Open Setup URI.
- Paste the URI and enter the same Setup URI passphrase.
3) Choose the correct onboarding path
- On “Mostly Complete: Decision Required”, choose:
“My remote server is already set up. I want to join this device.” - Click Proceed to the next step.
- Choose Restart and Fetch Data.
4) If prompts appear
- “Do you want to send all chunks before replication?” → choose No for normal join flow.
- “Fetch Remote Configuration Failed” → click Retry once, then Skip and proceed if needed.
- 401 Unauthorized / “You are not a server admin” → you entered reset/overwrite path; go back and choose the join existing server option.
- “Setting up database size notification” → optional; for SyncNotes 1GB plan, 800MB is a good early-warning threshold.
5) Important notes
- Keep the Setup URI passphrase safe; you need it on each additional device.
- The Setup URI passphrase protects the URI itself and is separate from the optional E2EE passphrase used for note encryption. Quick Setup sends both supplied passphrases over HTTPS to generate the link; SyncNotes does not store them.
- If E2EE is enabled, use the same passphrase on every device. Do not generate a new one when joining an existing encrypted vault. SyncNotes cannot recover a lost passphrase. Changing encryption settings does not automatically re-encrypt existing remote data; keep a local backup and follow LiveSync's migration instructions.
- After URI import, Synchronization Preset may look unselected; this is expected because URI values are applied directly.
- Use the reset/new-server option only when intentionally creating or overwriting a remote database.
Step 2 (Alternative): Manual configuration
If you prefer manual setup, configure the LiveSync plugin directly using values from your Dashboard.
1) Open the right settings pane
- Open Obsidian → Settings → Community plugins → Self-hosted LiveSync.
- Go to Remote Configuration, then choose the S3 or Object Storage section.
2) Enter object-storage connection values
| LiveSync field | What to enter |
|---|---|
| Endpoint | Your sync endpoint from Dashboard, e.g. https://sync.syncnotes.dev or your dedicated sync domain |
| Access Key | Your access key from Dashboard |
| Secret Key | Your secret key from Dashboard |
| Bucket | Your bucket name from Dashboard |
| Region | Your region from Dashboard. European deployments may use values such as eu-west-3 or eu-central-1. |
3) Validate connection and server config
- Click the plugin's storage connection test, if available, to confirm credentials and connectivity.
- Make sure path-style access is enabled if the plugin exposes that option.
- Click Apply Settings to save.
4) Optional manual options
- End-to-End Encryption (optional): enter or generate a passphrase in the Dashboard's Manual Configuration section, then copy it into LiveSync and enable encryption and path obfuscation before syncing. The dashboard field does not change your plugin settings. Save the passphrase safely and use the same one on every device; SyncNotes cannot recover it.
- If you leave E2EE disabled, uploaded notes may be readable by the service operator. HTTPS still protects data in transit.
- Use Internal API: useful when browser CORS rules block direct requests.
- Sync preset: use Periodic and On Events behavior for SyncNotes.
Step 3: Start Syncing
Once configured, your notes sync automatically. Repeat the Quick Setup URI on your other devices to keep all notes in sync.
Read-only retention after access ends
If your trial ends, your remote vault remains readable for 14 days. If a paid subscription ends, it remains readable for 30 days.
- You can continue to read, list, and download existing remote data.
- Uploads, edits, copies, and remote deletes are rejected during this period.
- Your existing connection details remain valid, so you do not need to reconfigure Obsidian.
- Reactivating before deletion restores read/write access with the same connection details.
Keep your local vault up to date before the retention period ends. After that date, the remote vault is deleted according to the Terms of Service.
Troubleshooting & Tips
- Connection test fails: Double-check Endpoint, Access Key, Secret Key, Bucket, and Region. All must match your dashboard exactly.
- Setup URI not working: Make sure you use the same passphrase as when you generated it.
- “401 Unauthorized” or “You are not a server admin”: This means you are in the reset/overwrite flow. Go back and choose the join option.
- “Fetch Remote Configuration Failed”: Retry once, then Skip and proceed if you’re joining an existing SyncNotes server.
- “Failed to initialize the encryption key, preventing replication”: the storage connection can be valid while LiveSync encryption is incomplete. Use the same E2EE passphrase on every device.
- “Tweaks Mismatched or Changed”: Choose Update with mine on your main device, Use configured on others. “Dismiss” postpones the decision.
- “CORS error” or “Failed to connect”: If you see CORS errors, try enabling Use Request API to avoid CORS in plugin advanced settings.
- Mobile cannot connect: Obsidian mobile requires HTTPS and a valid certificate. Self-signed or HTTP-only endpoints will not work.
- Bucket error: Use the exact bucket name shown in your dashboard.
- Access denied when writing: Check your Dashboard. You may have reached the storage quota, or the vault may be in read-only retention after your trial or subscription ended. Existing remote data remains readable during retention.
- Flag files for recovery: Place a file named
redflag.mdat the root of your vault to suspend all sync processes.redflag2.mdwill trigger a full rebuild,redflag3.mdwill force a fetch from remote. Remove the file and restart Obsidian to resume. - Logs & reporting: Enable Verbose Log and Write logs into the file in plugin settings to collect logs for support. Use the Make report button on the Hatch pane to copy a report for bug reports.
- CORS & reverse proxy: SyncNotes configures the storage endpoint for Obsidian app origins. Contact support if a client reports browser CORS failures.
- Database bloat: If your database grows too large, consider compacting it (requires free space equal to the database size). For persistent issues, contact support.
- Still stuck? Try a different network, restart Obsidian, or contact SyncNotes support with logs and screenshots.